Creation of Dimension Groups in MS Dynamics AX 2012
In MS Dynamics AX 2012 the item dimension group is divided into three Product dimension groups:
They are
1) Product Dimension group
2) Storage Dimension group
3) Tracking Dimension group
1. Product Dimension Group – contains the item dimensions (Configuration, size and color) as in the AX 2009. In 2012 we have two types of items – Product and Product Master.
2. Product dimension group can only be selected for Product Master Type of Items. (explained in detailed in another topic in my blog)
3. Storage Dimension Group – contains all the dimensions related to storage of an item or product (site, warehouse, location and pallet id).
4. Tracking Dimension Group – contains serial number and batch number setup.
Product dimension group creation
· To create a new Product Dimension Group
· Navigate to Product information management -> Setup -> Dimension groups -> Product dimension groups.
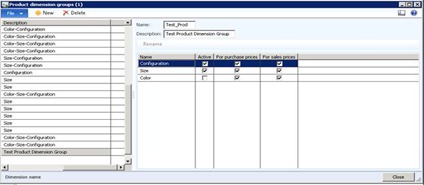
· Click the New button option on the bar.
· Enter Name as ‘Test_Prod’.
· Enter Description as ‘Test Product Dimension Group’.
· Click on ‘Active’ check box beside the Product dimension you want to as shown in the above figure to activate the Product Dimensions
Storage dimension group creation
· To open Storage Dimension Group form
· Navigate to Product information management -> Setup -> Dimension groups -> Storage dimension groups.
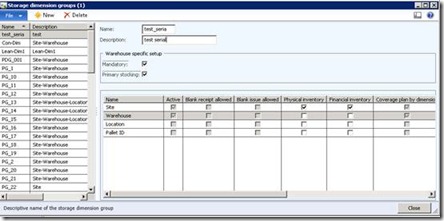
· Click the New button to create a new storage dimension group.
· Enter Name as desired say ‘Test_Stor’.
· Enter Description as ‘Test Storage Group’.
· To make warehouse a mandatory, then select Mandatory check box.
· To make Primary stocking active for warehouse then select the ‘Primary stocking’ check box.
· To activate a dimension select ‘Active’ check box for that particular dimension.
Tracking dimension group creation
· To open Tracking dimension group form
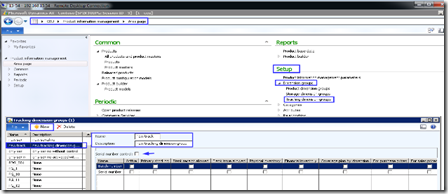
· Navigate to Product information management -> Setup -> Dimension groups -> Tracking dimension groups.
· Click “New” button.
· Enter Name, say ‘test_track’.
· Enter Description as ‘Test Tracking Dimension group’.
· Click on ‘Active’ check box to activate the serial/batch number. dimension
· To activate serial number control (a unique serial number can only be entered) select ‘Serial number control’ check box.
Assigning the Dimension groups to a new product of type Product Master
· To create a product for a single company or entity go to Product information management -> Common -> Released products.
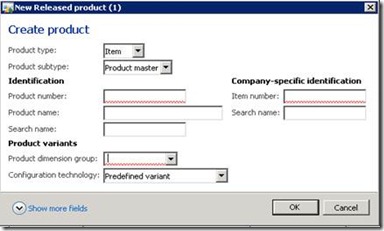
· Click the Product -> New -> Product button.
· Select Product subtype as ‘Product master’.
· Enter Product number, say ‘Test_Dimes_setup’.
· For a Product Master type of item, it is mandatory to assign a Product Dimension Group while creating that Product Master.
· Click the OK button.
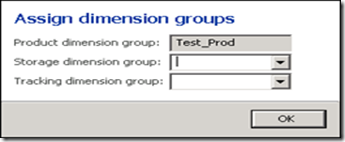
· To Assign Tracking and Storage Dimension Groups click the Product -> Set up -> Dimension group button.
· Select ‘Test_Stor’ as Storage Dimension Group from the drop down.
· Select ‘test_track’ as Tracking Dimension Group from the dropdown.
· Click the OK button.
· Save Released product details form.
Create Product Dimensions
· To open Product Dimension form
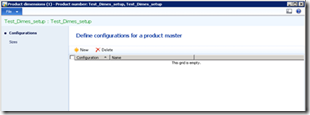
· Navigate to Released Product details form -> Product Tab -> ‘Product master’ action group -> ‘Product dimensions’ button.
· As we have only selected Configurations and size in the Product Dimension Group, we can only see these two Dimensions in the Product Dimension form.
· Now click on ‘New’ Button to create a new configuration.
· Enter the Configuration and description of that particular configuration.
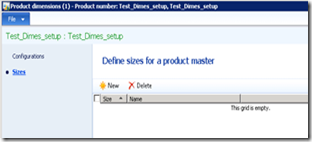
· Click on ‘size’ to create ‘Size’ dimension option
· Follow the same procedure followed for Configuration creation to create new ‘Sizes’.
· Save the Product dimensions form.
Creating Product Variants
· In AX 2009, there is a concept called Item Dimension combinations. An item must have item dimension combinations created in order to process items with item dimensions. The same concept is renamed as Product Variants in AX 2012.
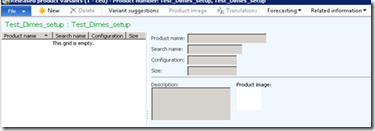
· To create Product Variants for a product go to Released Product form ->Product Tab -> ‘Product master’ action group -> ‘Released product variants’ button.
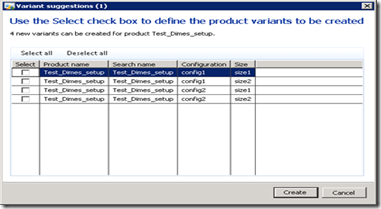
· Clicking on the Variant suggestions button will show all the possible combinations of Configurations and Sizes.
· Click the Select all button to select all the combinations or else you can select required combinations and then click on Create button.
· All the Product Variants are created.
No comments:
Post a Comment